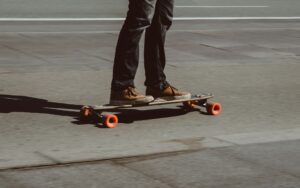

The safest way for a beginner to stop on a longboard is foot braking: keep most of your weight over the front leg, lower the back foot until the sole lightly touches the ground, and increase pressure gradually. Learn it at walking speed on flat, traffic-free pavement before riding hills.
This guide explains five ways to slow down or stop, when each method is appropriate, and the mistakes that make braking unstable. Wear a certified helmet and choose a practice area with plenty of runout. Do not attempt steep hills until you can stop reliably on command.
Before you practice stopping
Use a flat, dry and smooth surface away from cars, pedestrians and gravel. Check that your wheels spin freely, the trucks are secure and your shoes have flat, grippy soles. Start with a few gentle pushes rather than building speed. Your goal is repeatable control, not stopping as quickly as possible.
If you are still learning balance and pushing, begin with our complete beginner longboarding guide. A stable stance makes every braking method safer.
1. Foot braking: the essential beginner method
Foot braking is the most useful everyday technique because it works at low and moderate speeds and does not require the board to slide. Keep your front foot close to the front bolts and point it more forward than sideways. Bend the front knee, keep your chest upright and shift nearly all your weight onto the front leg.
Let the back foot hover beside the board. Touch the ground with the sole almost flat—avoid striking with the heel—and let it skim lightly. Add pressure gradually until the board slows. When your speed is close to walking pace, place the back foot down firmly and step off under control.
A simple foot-braking drill
First, balance on the moving board with the rear foot lifted for one second. Next, brush the ground without trying to stop. Finally, extend the contact time and pressure. Practice on straight runs and gentle turns, but keep your eyes ahead rather than looking down at your feet.
2. Carving to reduce speed
Wide S-shaped turns lengthen your path and convert some forward speed into lateral movement. Carving is useful for controlling speed on a gentle, open slope, but it is not an emergency brake and it requires enough road width. Look through each turn, bend your knees and make smooth heel-side and toe-side arcs.
Never cross the center line or carve where traffic may approach. As a hill becomes steeper, carving alone may not prevent acceleration. Combine it with foot braking and choose a safer route if you cannot keep your speed within a comfortable range.
3. Roll onto grass or a safe runout
At low speed, a clear patch of short grass can provide extra rolling resistance. Approach it straight, bend your knees and keep your weight centered because the board will slow abruptly. This is a backup option for controlled practice areas, not a primary road-riding technique.
Inspect the runout first. Hidden holes, curbs, wet ground and loose objects can throw you forward. Do not turn sharply onto grass at speed, and do not rely on an unknown verge as your escape plan.
4. Sliding: an advanced braking technique
A controlled slide rotates the board so the wheels lose traction and scrub speed. It can be effective for experienced freeride and downhill riders, but it is not the first stopping method a beginner should learn. Poor technique can cause a high-side fall, sudden grip or uncontrolled rotation.
Learn slides only after you can foot brake confidently, carve in both directions and ride with a stable stance. Use a helmet, slide gloves and appropriate pads, practice on a closed gentle slope, and ideally learn with an experienced instructor. Sliding should supplement—not replace—sound speed management and route selection.
5. Stepping or running off: last resort at very low speed
If the board is moving no faster than you can run, you may step off and continue forward for a few strides. Keep moving in the same direction as the board and avoid jumping backward. This becomes dangerous once the board is faster than your running speed, so it should never be your planned method for stopping on a hill.
Which stopping method should you use?
Walking speed: foot brake or step off under control.
Moderate cruising speed: foot brake, using gentle carving to manage speed early.
Gentle open slope: carve before speed builds, then foot brake.
High speed or steep hill: beginners should not enter this situation. Advanced sliding techniques require training and protective equipment.
Common longboard braking mistakes
Putting weight on the braking foot. This can pull you off the board. Keep your weight supported by the front leg.
Stomping the heel down. Sudden contact destabilizes the body; skim the sole and add pressure progressively.
Standing with locked knees. A low, relaxed stance absorbs vibration and improves balance.
Waiting too long. Start slowing before the hill, junction or obstacle.
Looking at your feet. Keep your eyes on the path and scan for hazards.
Using a hill to learn. Master braking on flat ground before adding even a gentle gradient.
How long does it take to learn foot braking?
Many beginners can understand the motion in one session, but reliable braking takes repeated practice. Do short drills at low speed until you can lift the rear foot, skim it smoothly and stop in a predictable distance without looking down. Increase speed only when the previous level feels routine.
Frequently asked questions
Can you brake on a longboard?
Yes. Longboards do not have a mechanical brake, so riders slow down through foot braking, carving, controlled slides or a safe low-speed runout. Foot braking is the core skill for beginners.
Which foot should I use to brake?
Most riders brake with the rear foot while the front foot remains on the deck. Regular riders normally keep the left foot on the board; goofy riders normally keep the right foot on the board.
How do I stop a longboard going downhill?
Control speed before it becomes excessive. On a gentle hill, combine wide carving with progressive foot braking. If a slope is too steep to stop comfortably, walk the board down and choose a safer place to learn.
Should beginners learn to slide?
Not as their first braking skill. Beginners should first master balance, turning and foot braking. Slides require more speed, precise weight transfer and additional protective equipment.
The safest progression
Start with foot braking on flat ground, add gentle carving once your balance is consistent, and stay away from hills until you can stop repeatedly within a known distance. Good riders manage speed early; they do not wait for an emergency to begin braking.